
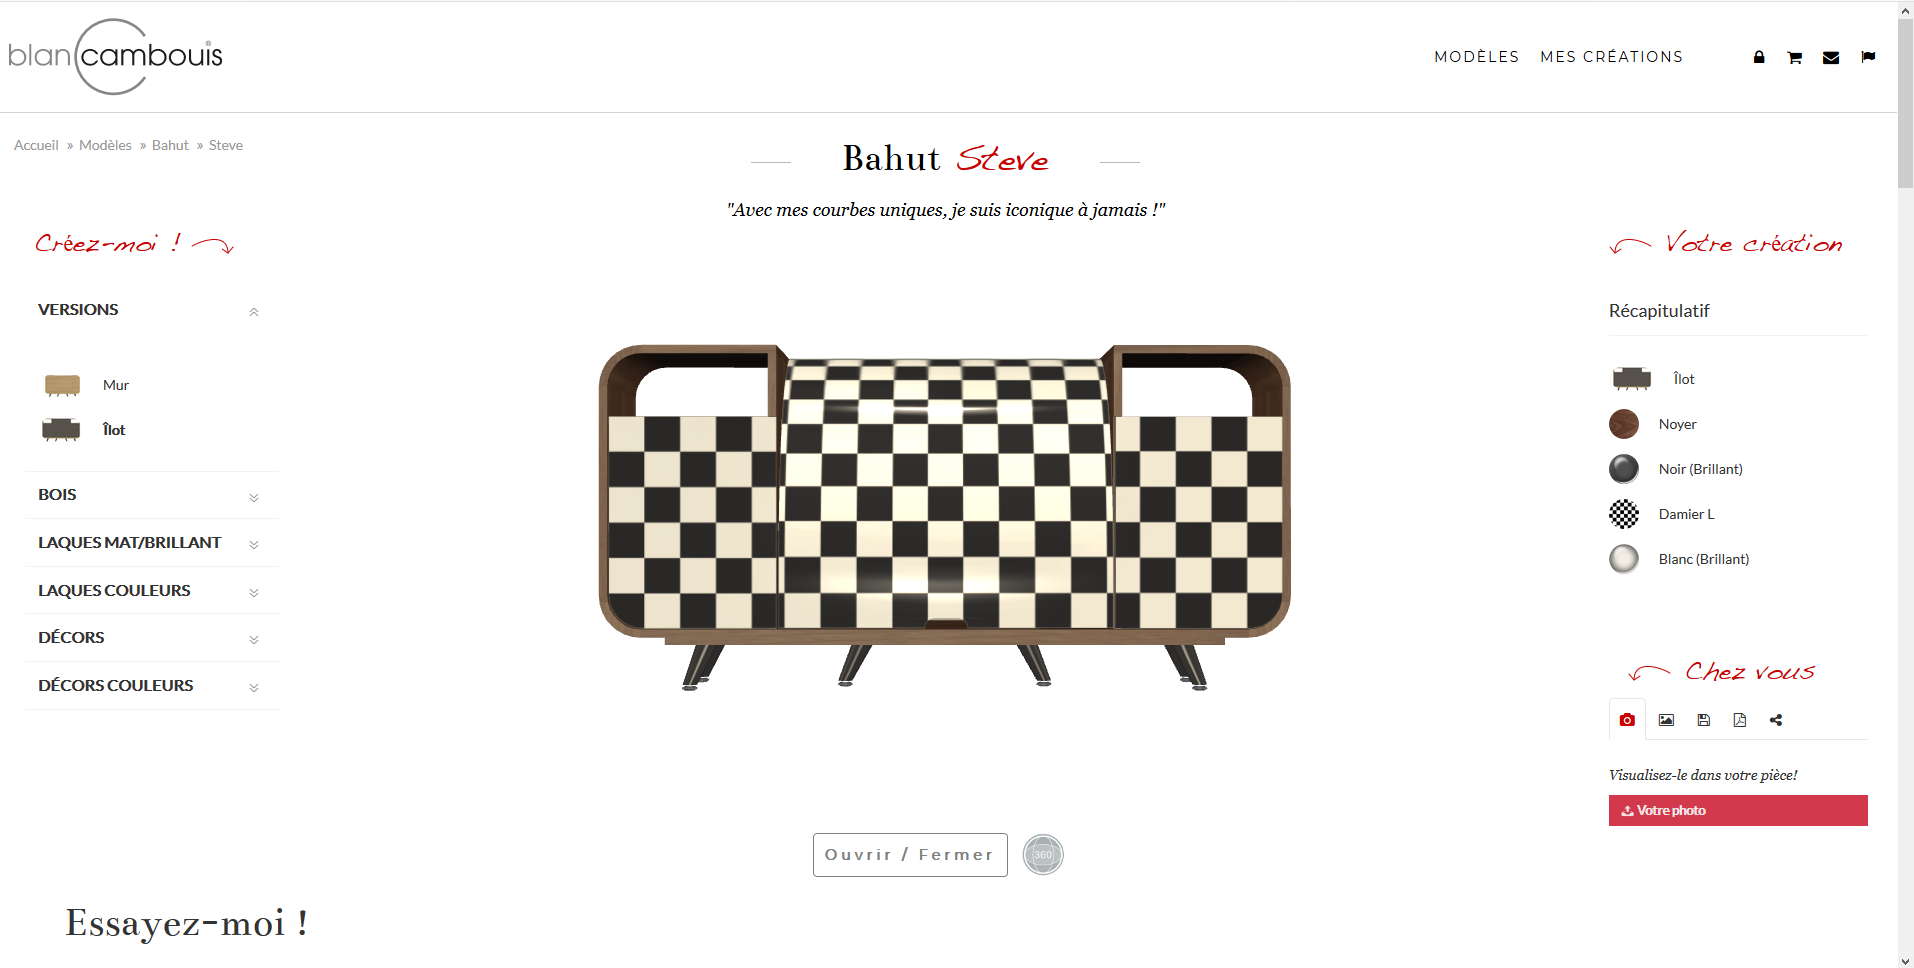
Blanc Cambouis is a company selling high end furniture to their customer. In order to let the customer visualize the product they are buying we were asked to create a custom real-time 3D object viewer, able to manage different kinds of models and to customize them on the fly.
While Integral Service worked on the web side of the product, us at Da Viking Code worked on the object viewer.
In order to meet their requirement we built a Three.js (WebGL Based) app using the Haxe language and yar3333’s Haxe extern for Three.js, we needed a modular solution to import the furniture into the engine, but also to enable the furniture’s multiple customization option without implementing new logic for each model.
Exporting with Unity
The first task for this project was to actually be able to create and customize the 3D scene to be exported into threeJS, as we were delivered fbx model and we wanted a Json scene.
For this purpose we used Unity for setting up the object’s scale, different object parts and the scene’s lights, then exported them with Nick Janssen’s Three.js JSON Exporter.

Unity exporting scene
Naming convention and customization
As the object was meant to have different customization option switchable in the engine (opened, closed, with or without a backplate, different wood materials, different reflectiveness and different colors on certain parts, sometimes with different patterns) we needed a way to express all thoses different states of the object so the same engine could manage each models with their particular options seamlessly.
A naming convention was chosen so the engine can identify the dynamic objects, understand their behavior and apply changes on the model accordingly.
The website just has to call certain functions with certain parameters and they can change color, texture, models, brightness on the fly !
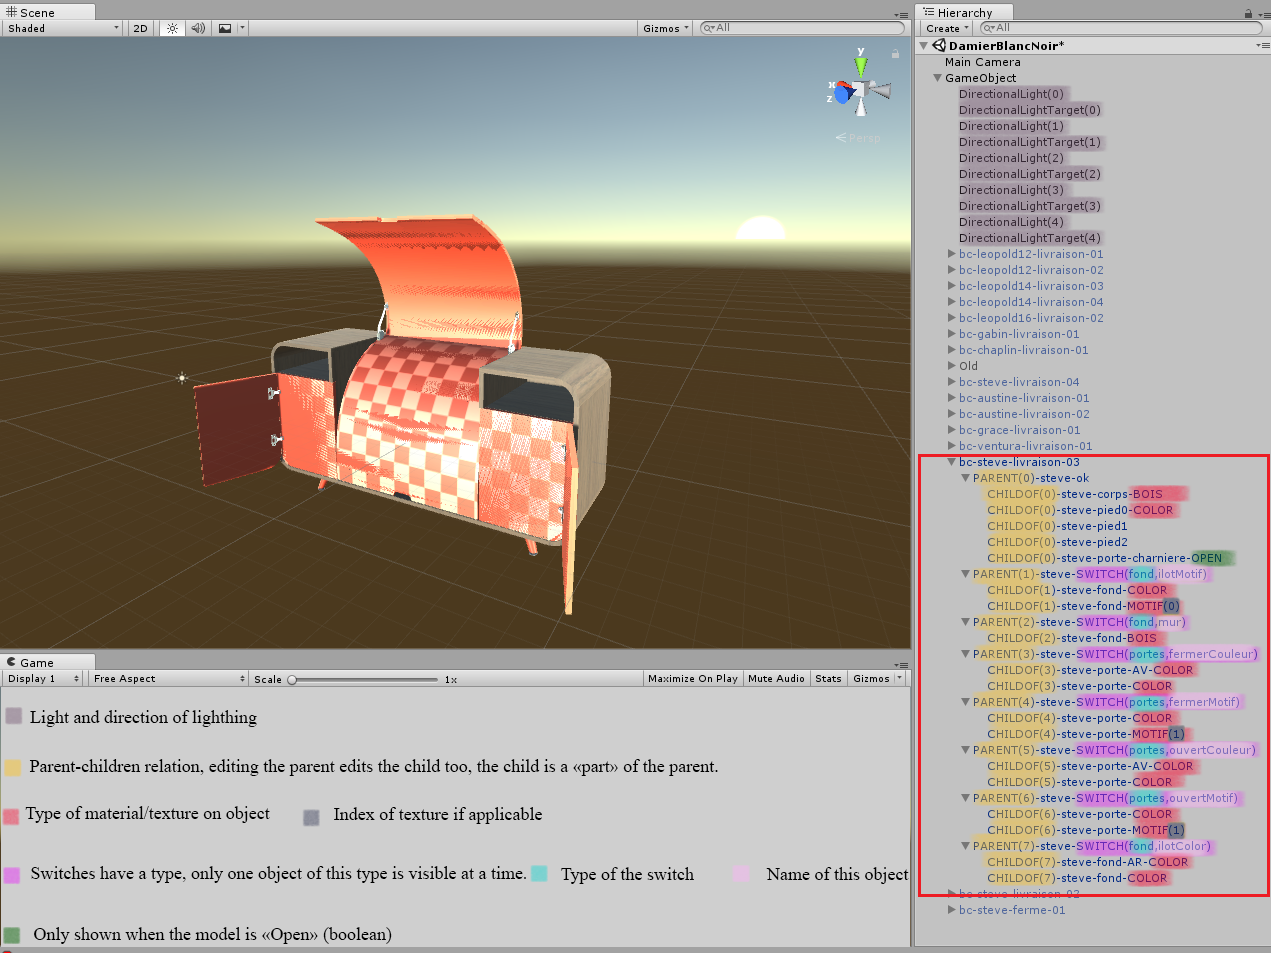
example of conventions and the way they behave
Customizing furniture patterns with a Three.js custom phong material
The furniture as we’ve seen, can be customizable in material (wood,plastic) , color (flat color) , or patterns (repeated printed patterns) for certain parts of each furniture models (panels, door handles…) .
We chose to have a unified shader to display either a color, a texture, or a black and white pattern, where the black and white colors would get replaced by user chosen colors, giving patterns a lot more customizability. That way, a single material can be used for every case, and every sub objects of the viewed model.
We started off writing a custom glsl shader for webgl, using three.js’s ShaderMaterial . However this would not take into account lighting info, shininess, or metalness, or environmental maps, or reflective maps, everything three.js has done and is available by default which would have to be rewritten from scratch assuming we could connect it properly to three.js default uniforms.
So we decided to do it the three.js way : using its prewritten shader code snippets that are called “shader chunks”. Those are glsl code snippets ‘assembled’ at runtime by Three.js internally to build up its available default materials.
A great idea to avoid redundancy of code and better maintainance of its source code I guess.
It was hard to find a tutorial or good info on this topic, most “customize your own three.js shader” articles will tell you how to start from nothing… and end up maybe coloring something with a solid color, with no lights.
Exploring how the basic phong material was defined and the three.js/src/renderers/shaders/ folder on Three.js’s github, we worked things out.
Thankfully, all shader chunks, uniforms, are intuitively named so that you can figure out which chunk/lib corresponds to what basic material – on top of that, once you get into the mind of people writing an open source project and you start understanding why things seem to be all over the place, it gets easier.
It’s possible to crossreference which’ snippet’ needs to be ‘included’ where , going through the ShaderLib files for example. We’ll keep Phong as an example, and here are its “specs” for which UniformLibs (snippet of code to defined uniforms in the shader program) to use.
And from this you can also deduce which vertex / fragment shader snippet is used. Here’s the link to the vertex one.
And again from this, you can deduce which other dependencies you need to slowly reconstruct, recompile, a full phong shader which will allow us to use the shininess properties, all the lighting options and reflective maps (and so on) three.js offers, without actually rewriting everything… or decompiling stuff at runtime.
So it is a painful process.
But once that is done, you get to understand three.js more, and can customize any other shader without starting from scratch and allow yourself to expand on the contributors amazing work on lighting shaders for example.
When coding in Haxe, there will be the problem of whether or not you have the necessary externs, however translating from .js to haxe , and adding to your externs so you get the necessary access is easy. The code might be long but things make sense you’ll see, it’s all about accessing “snippets” or “chunks” via statics.
So here’s a full .js example which reconstitutes a Three.js Phong Material and customizes it by ‘injecting’ glsl code to modify the fragment colors before lighting is processed, or the vertex positions before
You will find that the javascript part of this is creating the objects, lights, the shader itself, custom uniforms such as time, colors and other values required for this example.
The html part contains the “injected” fragment and vertex glsl code, some of which like the perlin noise algorithm (by Stefan Gustavson) is not ours so be sure to check out the comments.
This helps with not getting the js part cluttered with extra code so we have a nice example, the html part is really only for this example, the .js part can be adapted for everyone and hopefully well understood as the purpose is really to customize a base three.js material by adding chunks or snippets of the available three.js code one by one in an array, then joining it with “\n” so it makes for a valid shader program and that’s it.
Essentially this is what this project uses so the actual custom code , the non three.js shader code, is simply using a black and white pattern, two input colors, and lerping between the input colors based on the texture sample’s value so you’ve got a two color pattern with any two color you need.
Hi
I am also trying to develop a jewelry configuration using threejs. I am using clara.io for exporting the model of a Gold ring which loads perfectly. But I could not change the texture material to silver.jpg from Gold.jpg on click of a button or select of a drop down. I tried a lot but still stuck in that part.
Can you please help me with your guidance or reference.
Looking forward.
Hello !
I personally didn’t encounter any problem changing a texture during execution. Here you will find a simplified version of the function we used to do so, hope it work for you too !
setTexture = function() {

	console.log("Applying texture : " + texturename);

	if(texturename != null) {

		var someMesh = _myMesh;//THREE.Mesh

		var texLod = new THREE.TextureLoader();

		var Tex = texLod.load("path/to/texture" + texturename,function(texture) {

			console.log("LoadingEnded");

		});

		Tex.wrapS = THREE.RepeatWrapping;

		Tex.wrapT = THREE.RepeatWrapping;

		var material = someMesh.material;

		material.map = Tex;

	}

	texturename = null;

};
Googling to find a solution to similar project to what you guys did….The first link to that “Blanc Cambouis” site is taking you to a very bad site – a hacked site that attempting to install something on your computer. You may want to remove the link.
Could you tell me how long this took to build?
Hello, the development of the 3D part took one month once we’d all 3D models and textures.