
Today, Virtual Reality (VR) may be the hottest topic for interactive developers (Augmented Reality will be the next within few years for sure). Many constructors propose their own Head Mounted Device (HMD) : HTC & Valve with the Vive, Oculus, with their Oculus Rift and Gear VR for Samsung mobiles, Google and the very cheap DIY Google Cardboard, and many other ones. Naturally, Unity, which is the leading global game industry software (45% market share, 47% of developers), rapidly proposed built-in functionnalities to handle some of the VR devices.
In the end of the last year, we have been asked to create Unity tools to quickly prototype virtual visits with the Google Cardboard. It was the perfect project to dive deeper in the world of VR. Here, virtual visits were a set of photo-spheres and video-spheres, which are respectively photos and videos projected inside spheres, giving you the impression you are surrounded by the scenery (think about Google Street View). Furthemore, some parts of the photo-spheres had to be interactive and display some additional content like photos, videos, text, …
Google Cardboard and Unity
At this time, Unity doesn’t support natively the Google Cardboard and you will have to follow some steps before creating your first app. Naturally, Google has provided a guide if you want to get started with the Cardboard. Patrick Catanzariti made also a very nice tutorial for more advanced features like the gaze detection.
But, but, but, Clay Bavor, the vice-resident of Google’s virtual reality division, announced during the Vision Summit that the developers will be able to use the Cardboard inside Unity without the need for plugins or separate installs. Victory ! ✌🏻
Detecting interactive zones 🔎
Here, I will talk a little about the detection of interactive areas of our photo-spheres. Since these areas must be precise, we could not use a simple method using place colliders for example between the camera and the photosphere, or use an algorithm used to solve the point-in-polygon (PIP) problem. I implemented a solution based on the detection of the pixel color of a “mask” texture.
For the example, let’s go into the Hellbrunn Palace in Austria. I am very interested by three paintings and I want to detect them. I will create a texture with the three areas colorized in a specific color, the rest will be in black. Then, each time the camera rotates a ray is casted from the camera to the center of the screen (representing the gaze of the user). When the ray encounters the collider of the sphere representing my scene (where the 360° photo is mapped on), I get the pixel’s color of the mask texture using RaycastHit.textureCoord and Texture2D.GetPixelBilinear. If the color matches with the color of one interactive zone, I trigger the action associated to the interactive zone !
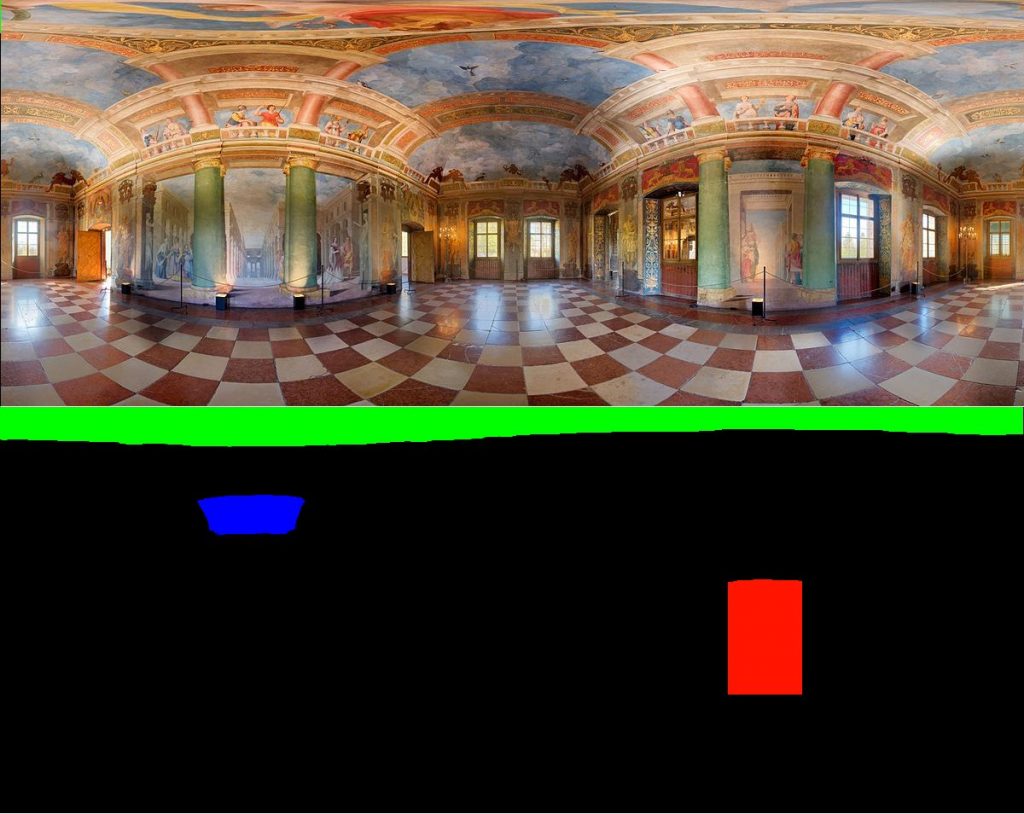
To indicate the user an action can be performed if he clicks while looking at an interactive zone, I use a shader I made to highlight the hovered interactive zone. This shader uses the standard texture, the “mask” texture and two colors : the color of the zone to highlight, and the highlight color.
Quick tips Google Cardboard and Unity 💡
First of all, if you plan to create a VR application / game, whichever device you use, you must keep in mind that virtual reality is not like any other standard app / game. You should follow some rules, nicely described by Google in its guide 📄, or in its application 📱.
Here are some tips about the Google Cardboard plugin for Unity, until the native integration is out :
- Try to keep a single instance of the
CardboardMainprefab throughout your application. Otherwise, you may have a white flash when the new scene is loading, which is very unpleasant for the user - This may be a stupid and obvious trick, but make sure your user knows “where he’s looking at” ! Add a pointer or highlight the object he’s currently hovering
- For best immersion, hide the UI Layer of the Cardboard by turning the variable
uiLayerEnabledto false. You will still be able to show the settings dialog by callingCardboard.SDK.ShowSettingsDialog() - Turn on and off the VR mode with the boolean property
Cardboard.SDK.VRModeEnabled. Adding a delegate to indicate the mode has changed may be a good idea
Experimenting with 2D illustrated content
Now who said VR is only for reality? A small but interesting request came to us and we thought it would be worth mentioning because VR can be so much more than what has now become commonplace 360 video concerts and so on.
We were given a wide 2D illustration of a city and asked if we could make something “VR” off it. We took on the challenge.
Now the full illustration which can’t be shown as is, simply shows a panel of monuments from Cairo in the 14th century (If I’m not mistaken). We have markets, pyramids, mosques alongside churches, a lot of sand and a bit of greenery and people everywhere. The idea was to display a bit of info on those monuments after looking at them for a couple of seconds – that would be the only point of this little virtual reality tour of the hand drawn and not up to scale city.
Projecting on a square or a circle was out of the question obviously since the image was not meant for that, it looked like it could however be turned into a simple 180° panoramic view (on a cylinder). So we tried that first.
From the flattened out image, we would generate a plane mesh, project it on half a cylinder. That makes it such that we could look right and left 90° both ways and see something interesting, but no depth at all.
We then separated people from the background, and removed the actual background (sky, sand) and used a default skybox and a terrain with a very subtle sand texture (almost a solid color to match the illustration).
Now the mesh would stand up in an empty environment, but it was better than anything. We would sculpt the Terrain a bit too.
Then an idea came to mind. Why not re generate the mesh but this time, bring towards the center of the cylinder vertices so that some elements of the image would be closer than other – finally giving some depth to that 2D image… Even though we had no 3D models.
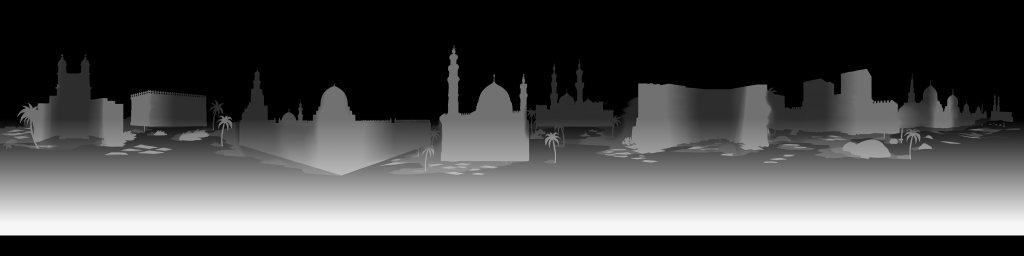
So a rough heightmap with some gradients was created :
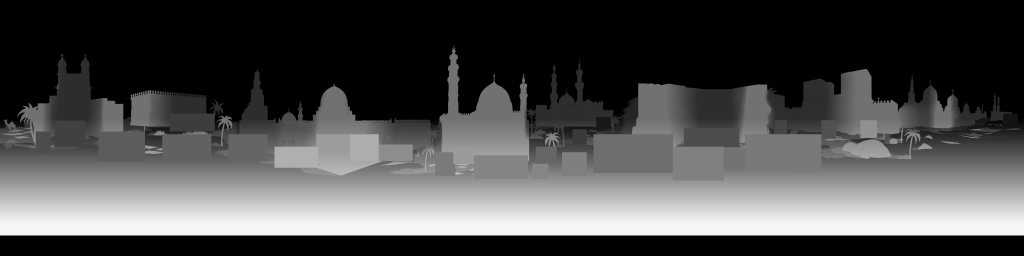
As we divided the image into background (monuments) and foreground (people) , a heightmap for the latter was created as well
So we’d have 2 meshes at the same position, each for one image layer… And finally we felt some depth. Still not 3D… But not flat and lifeless either.
(Here’s the background mesh)
<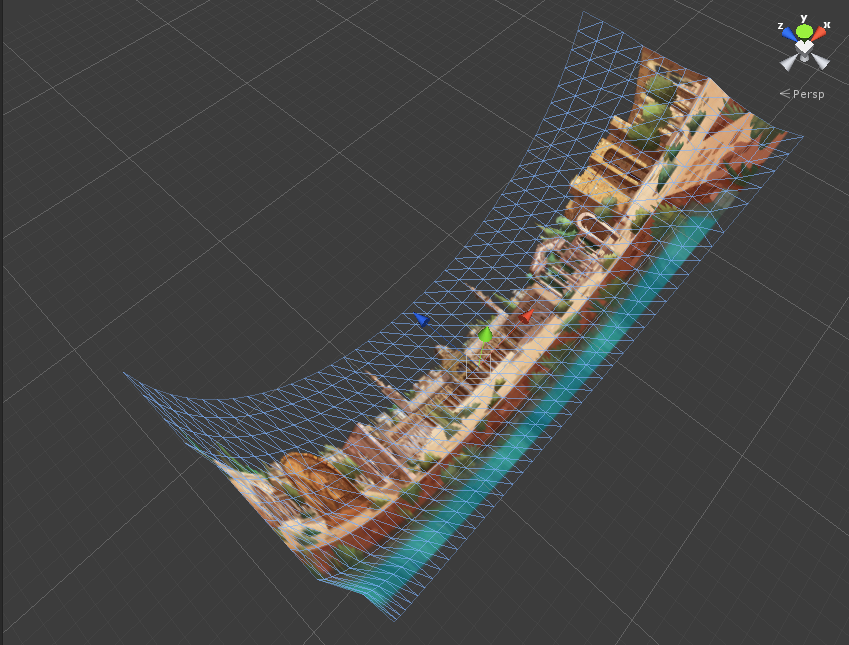
The view point would be at the cylinder center so the viewer would see a minimal amount of texture stretching, and we didn’t push the scale of the heightmap too far.
Still, this was better than nothing and was tolerable.
We’d only have to place colliders on each monument and make a world space ui popup for the user at an easy on the eyes distance.
At this point though, a completely different approach was also considered and tested, this might sound like the most obvious one now…
See, up until now, we wanted to stay as close as possible to the original thing, but introduce depth, having promised no miracles since we had no resources for 3D modelling and so on.
But obviously we were asked a VR experience. So we kept this aside and did things from scratch… Our client having just a rough idea of the end result but having asked absolutely nothing particular, but still happy about what we had so far. We thought we might as well do something drastically different and still bring the best out of this image.
So every element would be cut out of the original illustration, and simply placed in the world around the user… and in Billboard style, each element (sprites basically) would always face the user no matter what. (this can be a problem with large and close sprites visibly turning as you turn so be careful).
We could duplicate trees, sculpt the terrain more, isolate the pyramid and put it a considerable distance and scale so everything would be much more natural in terms of depth perception and scale to the user, effectively getting rid of the inconsistencies we’d have with the single mesh approach… Then result of this, though no one was convinced when we pitched it and understandably so, was something we had more control over, richer than anything else we could do (without actually having to touch any 3D modelling software) and finally a worthy VR experience.
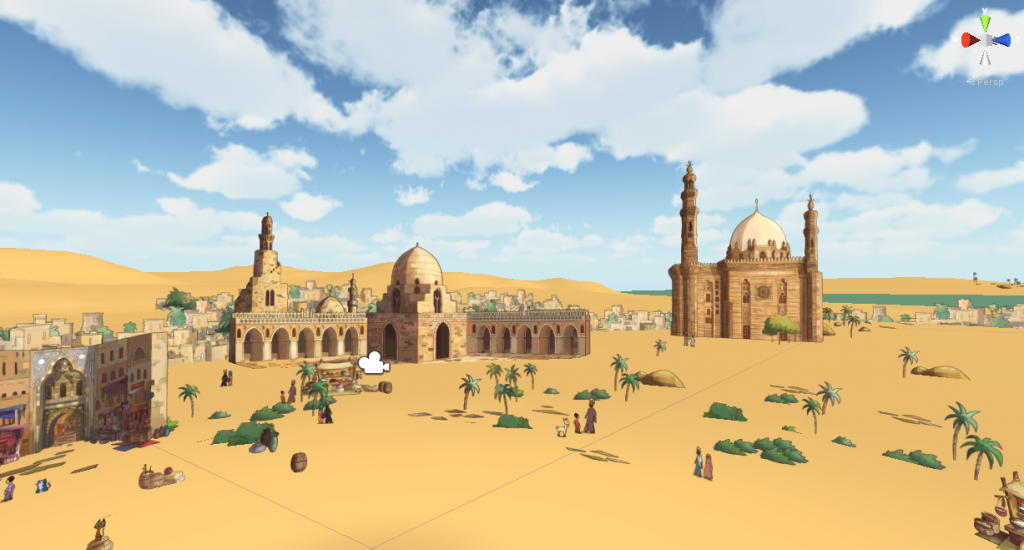
To be fair though, the user still realizes that he has a lot of “paper mario people” around him, But this is far more interesting and immersive as you are surrounded by people, places and sounds.
The people who would get to see this were people who likely would not have even heard of VR at that time.
Sounds (loops and oneshots) were added in the 3D space (market, mosque, port area) to give it even more life. At that time we didn’t use an audio plugin for binaural audio, but we still did some basic form of filtering : Based on the relative angle of view to every sound object, that sound object would be filtered (low pass filter) so that sounds behind the viewer would have less high frequencies… This doesn’t get anywhere to what actually happens in real life… But it does help focus on what you’re looking at as everything around you other than what your facing is a bit “aurally blurred out”.
Here’s a video capture of the final thing (a bit shaky and no audio unfortunately)
2D running with VR from Da Viking Code on Vimeo.